
Backpacking Gear Guide

A FEW NOTES ABOUT THIS GEAR GUIDE
This blog post features mostly womens clothing. All the camping gear is unisex however, and we are currently creating a separate guide for mens clothing.
This blog and associated lists are NOT for mountaineering or navigating in advanced terrain. Always check trail conditions and hiking difficulty before embarking on a trip, and be able to recognize your capabilities for each trail. Make sure you’re comfortable with the miles, elevation and have prepared for conditions.
To prevent you from making the same mistakes we did, we hope this blog post will help you out whether it’s your first backpacking trip, or you’re looking to upgrade your gear. When we first started, we didn’t have the proper shoes, our backpacks were heavy, sleeping in a tent was cold and uncomfortable, and we had absolutely no idea what we were doing. This blog posts consists of all the items we use and love, as well as similar alternative options.
We know all too well that backpacking gear is expensive. What we have learned over the years is that cheap gear is great for a little while, but doesn’t last nearly as long. It makes backpacking much less comfortable than if you have gear that you love. To start, the items we recommend not cheaping out on are a sleeping bag, down jacket, and tent.
*this blog post contains affiliate links, and we make a small commission for each sale. There is no extra cost to you, and helps us continue to
provide free guides and information. Appreciate your support so much!*

Backpacks
MULTI-DAY PACKS
We’ve had our Osprey Backpacks for almost 8 years now and it is still in amazing condition! Nothing has been broken or worn away, and it’s seen its fair share of adventures over the years. If anything ever happened to these ones, we would 100% buy the same bag again. Julia’s bag is 50L, Chris’ bag is 65L and we found these to be perfect sizes for us, anywhere from 1-5 nights. Make sure you get the right sizing to keep your bag comfortable when carrying up to 40 lbs! Julia is 5’3 and her bag size is XS, Chris is 5’11 and his bag size is Medium.


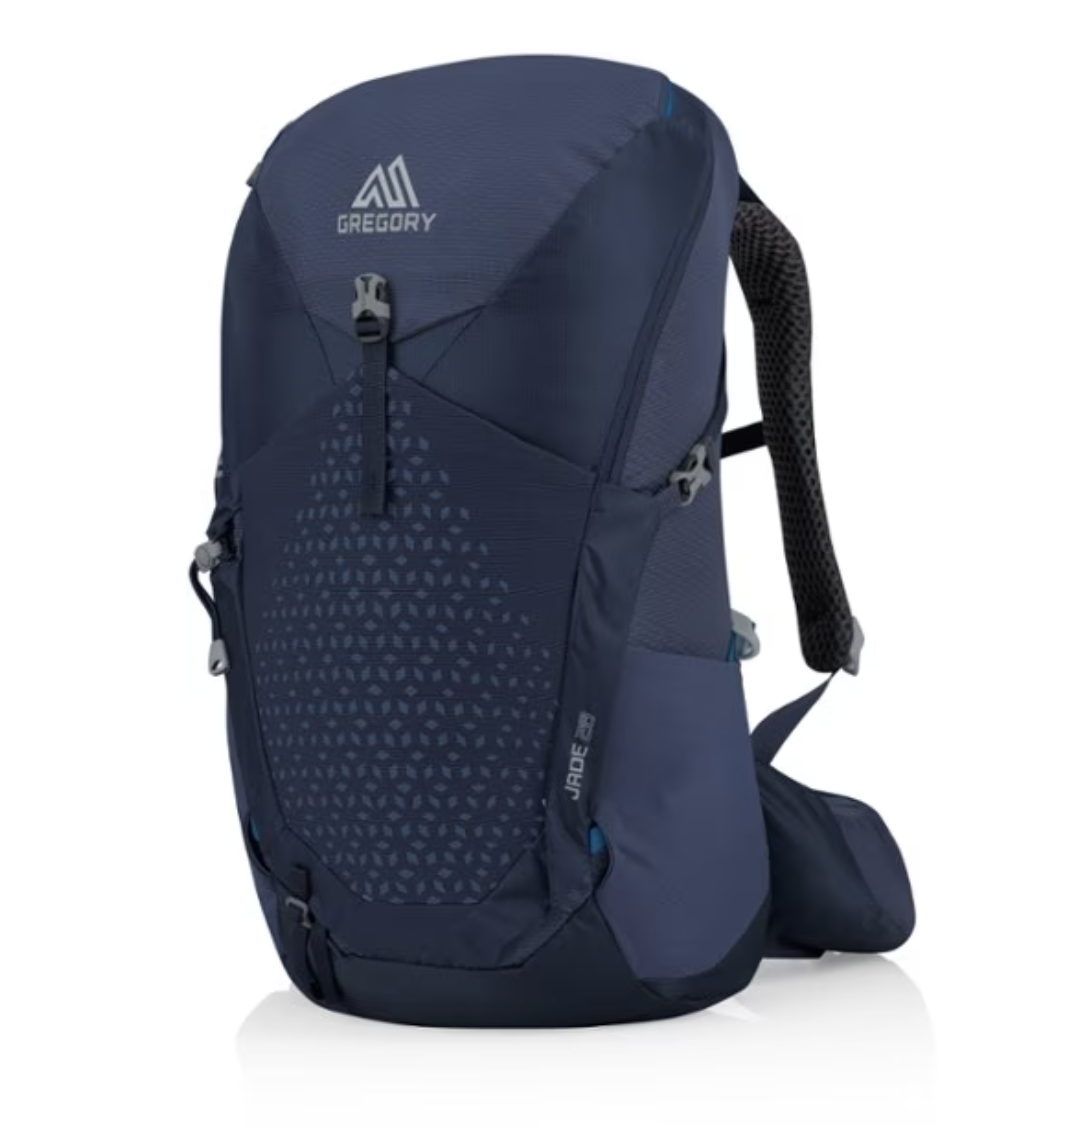
DAY PACKS
We love our Gregory Daypack and Osprey Daypack! They are quite large compared to most daypacks, only because we need the extra space for camera gear, layers and cooking since we often hike for sunrises or sunsets. We find these double as an overnight bag when we have less stuff!


Big Agnes Tent (a great tent we used in Norway with Angela Liguori!), Patagonia Sweater, Marmot Sleeping Bags, Haddock beanies
Sleeping and Shelter
BACKPACKING TENT
The tent we use is arguably quite pricey, however, it’s high quality, spacious, very light and easy to set up compared to tents We’ve had in the past. We love how the Hubba Hubba NX 2P Tent has a large rainfly to store boots and possibly your backpack under cover and away from the elements. Make sure when choosing a tent that the weather sealing extends at least a couple of inches off the ground to help with rain coming under the rainfly during higher winds. The Hubba Hubba NX floor extends up the sides of the tent far enough that we have never had rain come in. I love the extra pockets on the inside for easy to access headlamp, watch , and other items that can get lost in the midst of your sleeping arrangement. Having a tent footprint is important, because it helps prevent damage and wear and tear to the tent floor.


SLEEPING BAG
Having a warm sleeping bag has been a game-changer for Julia who gets cold easily, and has made nights so much more comfortable and warm. Sleeping bags can either be synthetic or down - Julia uses the Marmot Never Summer sleeping bag which is no longer sold in REI, or many major stores however, we have found the closest ones that I would personally purchase below. Chris also uses a Marmot Sleeping Bag.
Down is known to be lighter and pack down more than synthetic, however, one of the cons of using down is that when it gets wet it is incredibly hard to dry on cold days. You can opt for a water-resistant sleeping bag, however these are much more costly. We have never had our sleeping bags get wet because our tent has kept us very dry, so this hasn’t been an issue. We love that the Marmot bags have extra padding in the areas that contribute to body heat loss such as the feet, head, and neck.


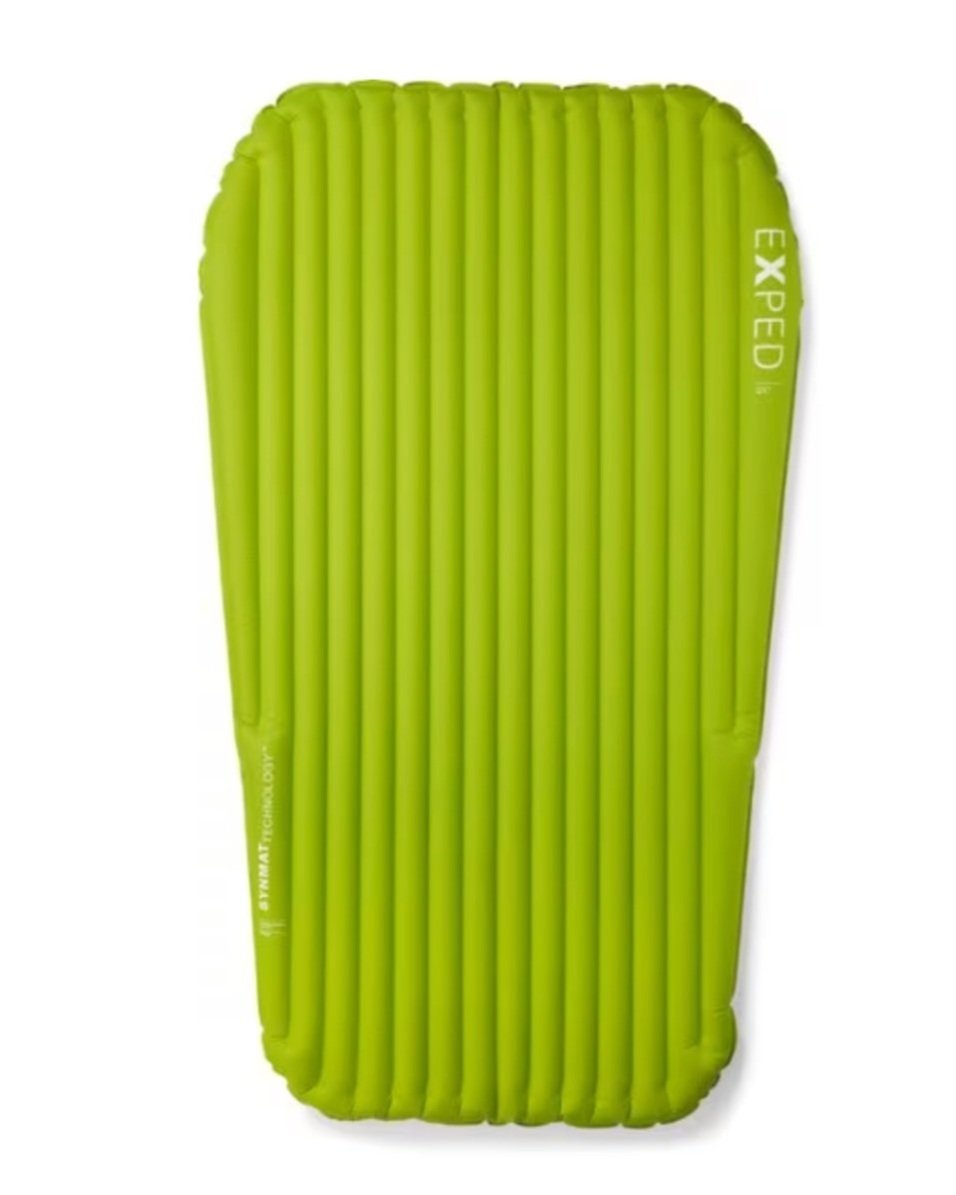
SLEEPING MAT
Currently, we use the Exped Ultra 3R Duo Sleeping Pad. This is an absolute game changer if you always backpack with someone! It is as small as one pad when packed down, has a middle wall so you can’t feel the other person move, and is easy to inflate with the air bag. Highly recommend!

PILLOW
For some reason, this was one of the last things added to our backpack, and we really wish we had it sooner! They pack up so tiny and make sleeping worlds better. We promise you won’t regret getting one of these! I use the Sea to Summit Aeros Inflatable Pillow.

Cooking and Hydration
HYDRATION
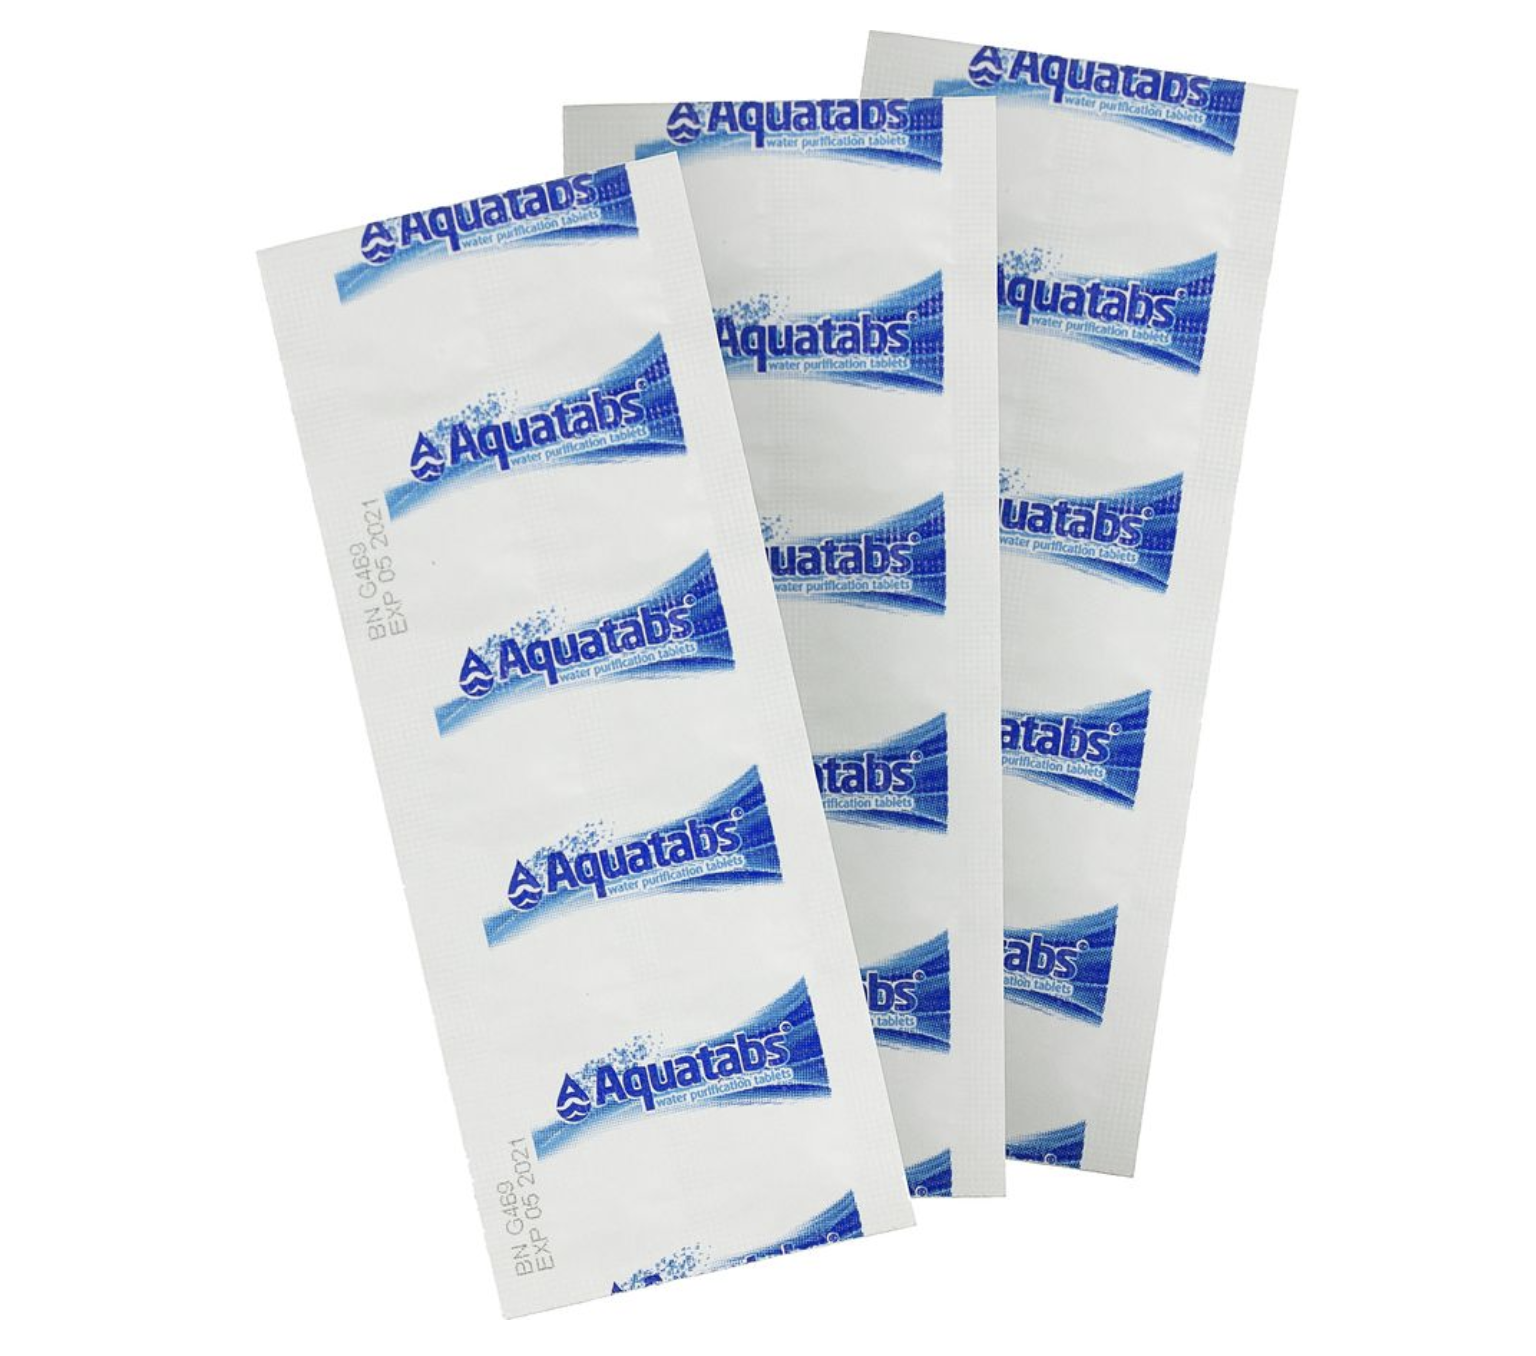
Do trail research beforehand about water sources and know the type of terrain that you’re hiking in. In the Pacific Northwest a lot of our water sources are very clean, and we find using water purification tablets to be sufficient in non-stagnant water. We also recommend getting a water filtration system such as the Platypus Gravity Filter. This is hands down the BEST filter we have ever used. Hydration tablets are great for balancing electrolytes on long treks, and are a staple in my backpack. Without them we find we get dehydrated much quicker, and this can lead to joint pain and muscle cramps/stiffness.
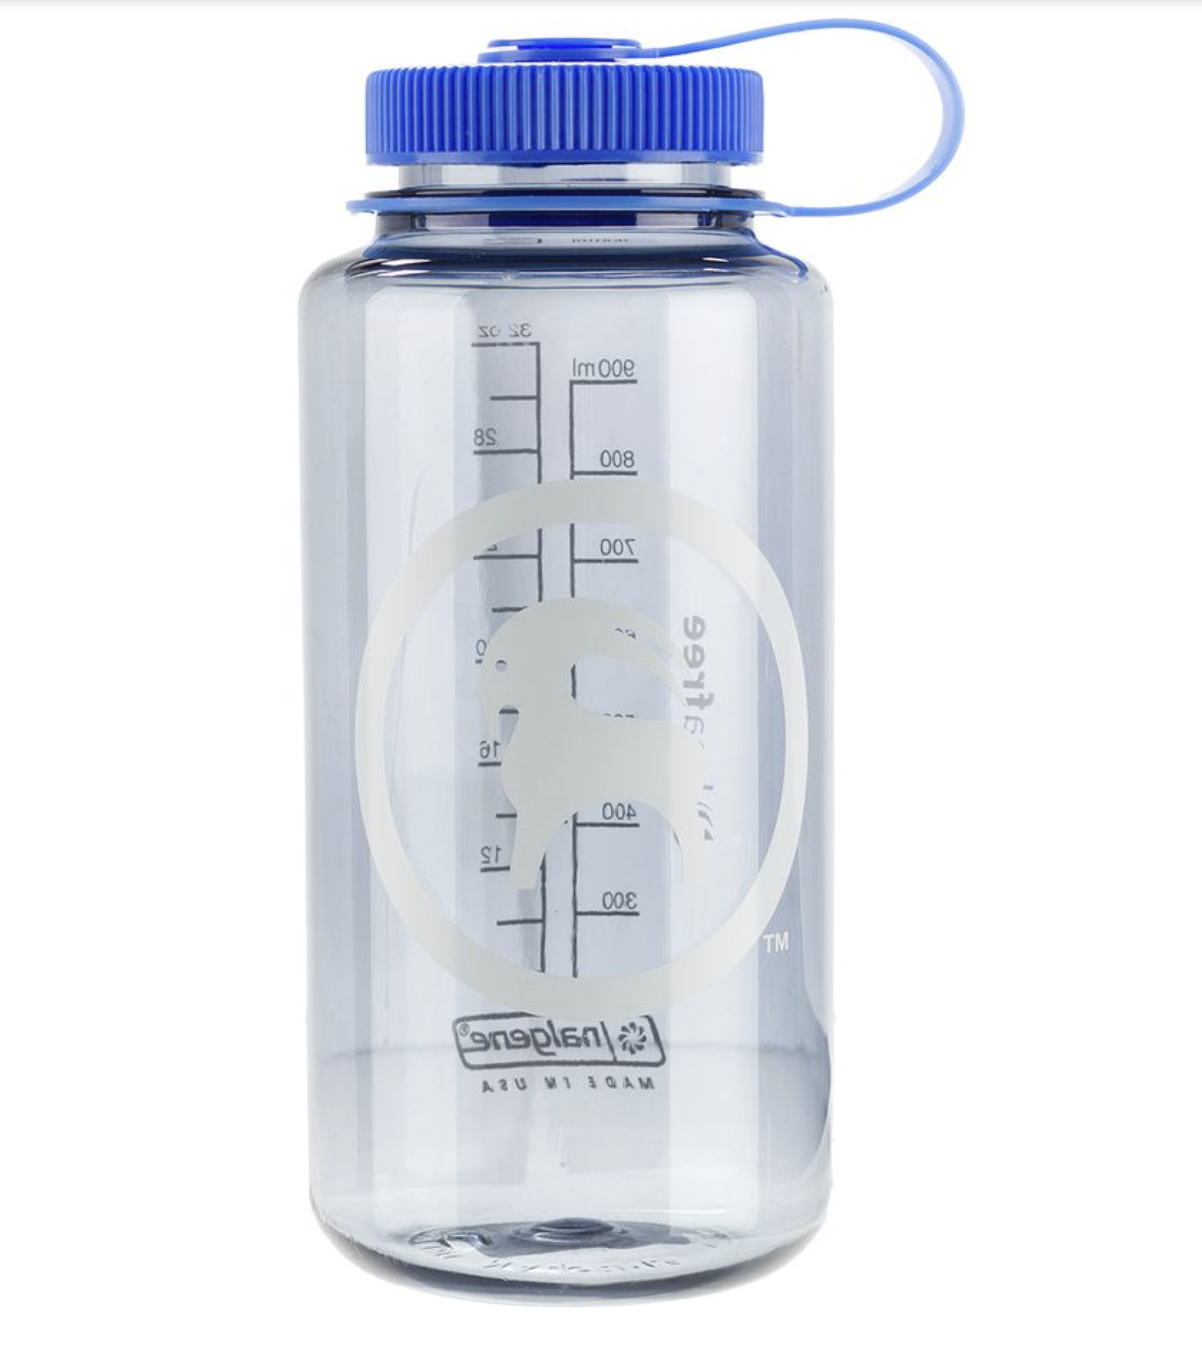
We use the Osprey Water Reservoir on every hike and love having the spout accessible at all times. We always bring a Nalgene Bottle each as well for easy access to refills from streams, and we put hot water in it on cold nights to put in our sleeping bags.


FOOD
We will be adding an in-depth blog post about what we eat backpacking on the trail. We choose foods that are high calorie and high protein. For now here is a quick list of what we generally pack:
Granola/protein bars, dates, dried fruit (mangoes), nuts and seeds, oatmeal, nut butter, plantain chips, dehydrated meals, rice ramen, pasta, coffee, dark chocolate, packaged dinners such as Tasty Bite. Dates and almonds got us through a couple of 5 day treks, and found this to be such an energy-efficient snack for long hikes. We don’t recommend having a big meal before or during a hike as it can make you drowsy and uncomfortable with a backpack on.
COOKING
Bring extra lighters! There is nothing worse than a lighter getting water-logged or empty while in the backcountry and you don’t have a spare.
For a backpacking stove and fuel, using a JetBoil instead of a Pocket Rocket has been one of the best upgrades to our backpack. The reason being is that a JetBoil boils water MUCH faster and is more fuel efficient in cold temperatures and wind. The only downside to this, is that you’re limited to the meals you can cook. It’s great for dehydrated meals that require only water added, or meals that you can heat up in the bag. You can cook meals inside it, but it’s a lot more difficult because of the high heat. I love how the JetBoil comes with a pot attachment already, as opposed to the pocket rockets where you have to buy the cookware.
When choosing fuel, it’s best to purchase from the same brand of your stove to ensure proper connection. Your stove will have information on which blend is best.


Other Cooking Items
Bamboo Cutlery - You don’t realize how useful an item is until you have it! Get a bamboo cutlery set that has a long handle, to make sure you get every last bit of your well-earned meal. I recommend not getting the cheap plastic cutlery. They break easily, you end up buying more and are a waste of plastic!
Camp mug - The HydroFlask Mug is a great option!
Silicone Sealer Bags for Cooking - These make clean-up so much easier for your meals! Store your dehydrated meals in these bags, and pour in hot water to cook. They are both heat and cold-safe! I also use these to safely store snacks and other food items.
Safety and Personal Hygiene
Headlamp | We have used a Black Diamond Headlamp for years. Highly recommend getting a headlamp that is at least 350 lumens to be able to see well after dark.
Sun Hat and Sunglasses - we love the Patagonia hats for hiking, and any 100% UV blocking and polarized sunglasses will work great (not necessary to buy an expensive pair!).
Bear Spray | Not necessary in some countries, but in mountain regions of Canada and the USA this is a must for both day and overnight hiking. Not only for bears but other wild animals such as cougars. You can find bear spray at most local outdoor shops.
Bear Food Storage Bin Choose your size here. Again, not necessary for everywhere in the world, but where there are bears this is a great way to store food. These are required in many parks in the US and Canada. Alternatively, you can bring cord to hang your food bag in a tree 10-15 feet high. Even in an area without bears, you should hang your food to prevent critters and other wildlife from getting to it.
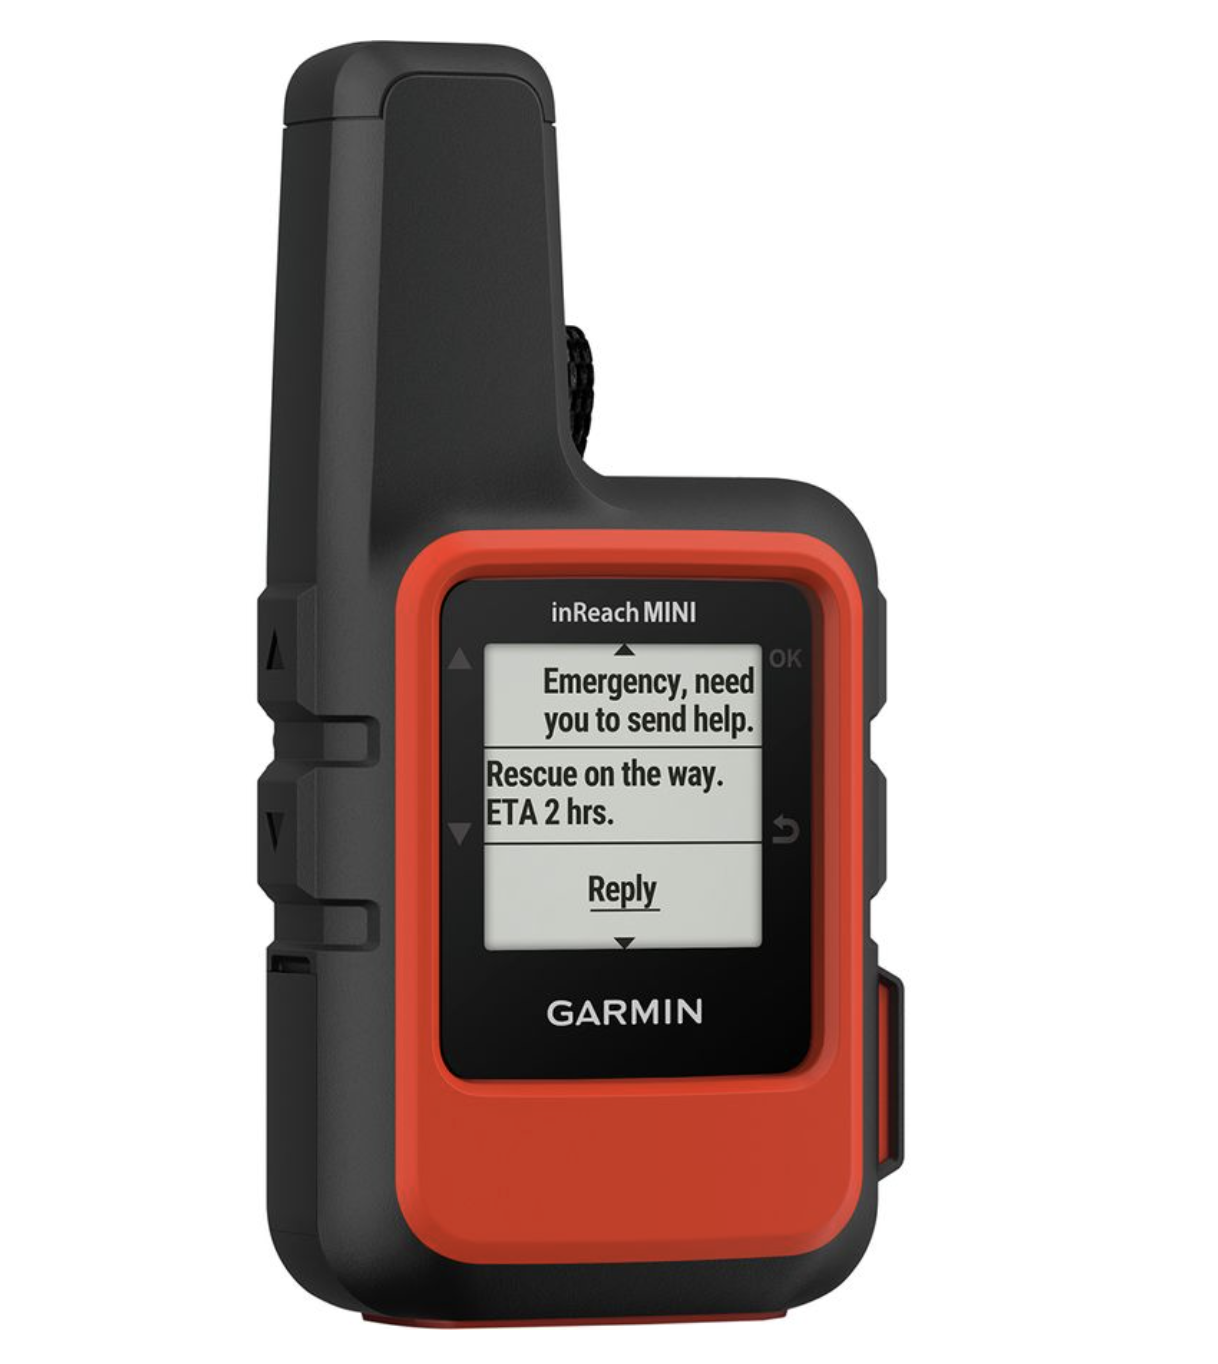
GPS/SOS beacon | We are embarrassed to say this was a fairly late addition to our pack. Not only is this important for your own safety, but for the safety of others. Whether you’re coming across a hurt hiker, or you get lost (which can easily happen), or need to update your emergency contact with your whereabouts, this is an extremely important device. The cost may seem high, and you may never use it (which is hopefully the case), but it could save yours or someone else’s life. we highly recommend the Garmin InReach!
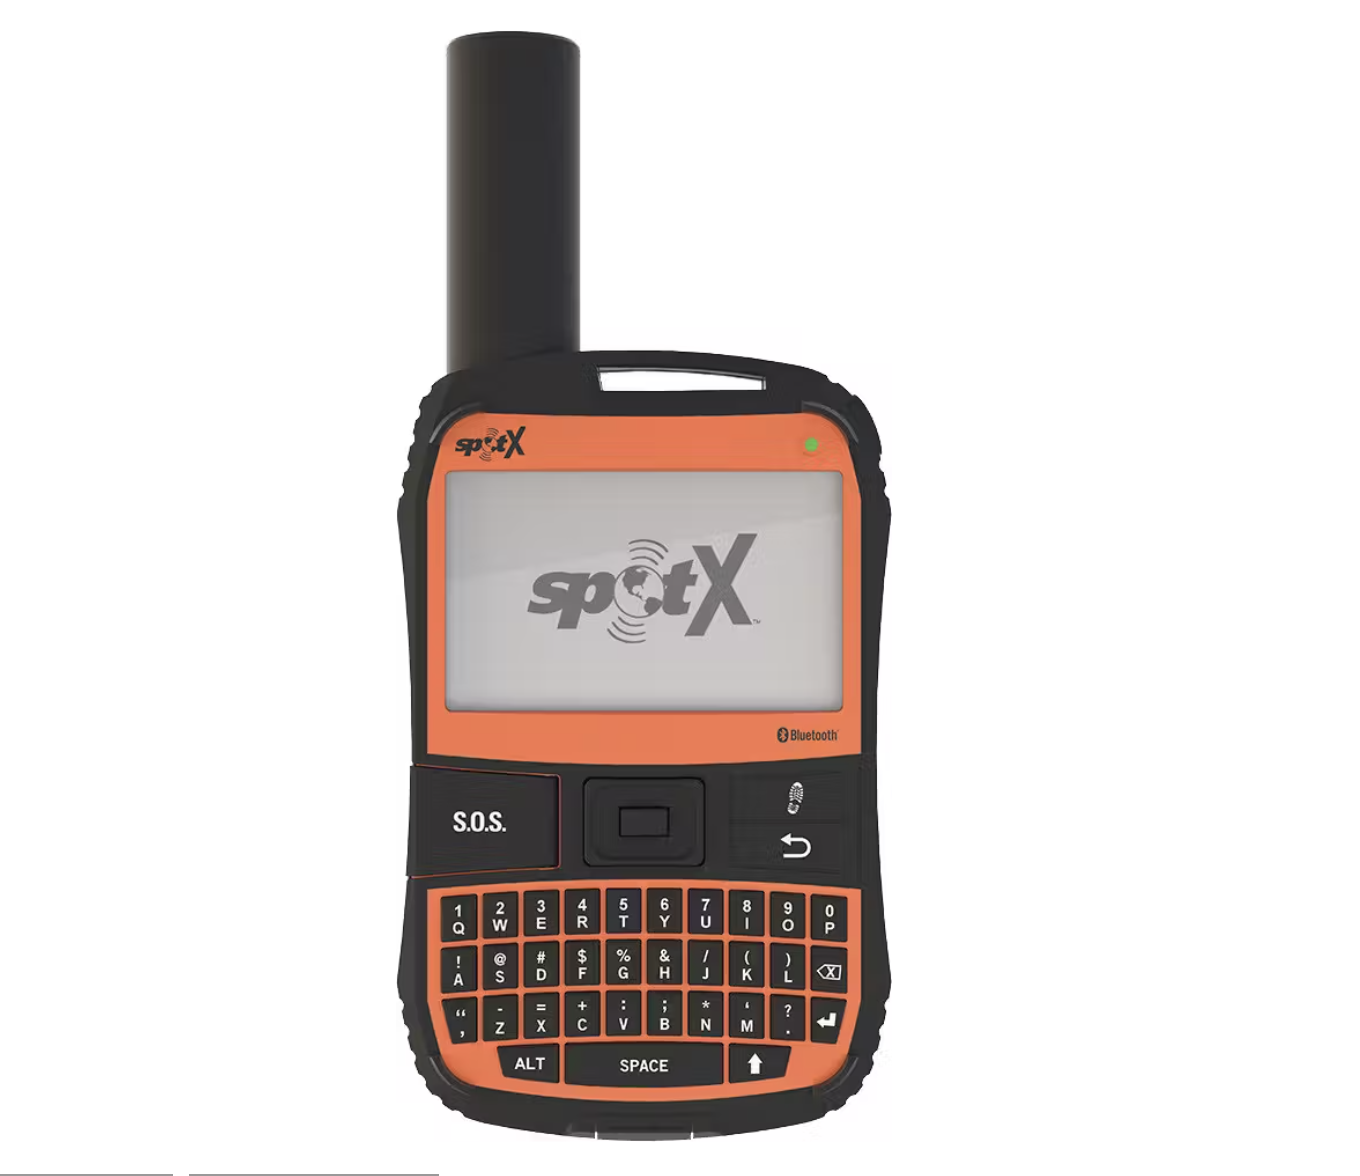
Alternatively, the SPOT is one of the more popular GPS devices.
Lightweight, Waterproof Medical Kit
We can guarantee you will need to use this kit several times, not just for emergencies but it is useful for many instances; this is a must-have. Choose a kit based on what kind of trips you usually do (1 Day, Multi-Day, etc). If they aren’t already included, make sure to add the following items:
Sports Tape Oh how this product has saved us SO many times. We have used it to wrap our feet to prevent blisters on multi day hikes, have used it to tape up a ripped tent, and securing a bandaid on a cut.
Emergency blanket - We have only ever had to use this once, but we are happy we had it. It was a shockingly cold night in the mountains even though it was summer. You can never predict what the temperatures will be like out there, so this is good to have incase of freak weather incidents, or if something happens to your gear.
Tweezers for ticks/splinters
Knife or Multi-use tool
Hand warmers - these have been useful even in the middle of summer, where temperatures can drop in the mountains.
Travel size bug repellent (summer)
The kit should already contain after bite, gauze, bandage, needle, alcohol wipes, safety pins and more
List of Personal Hygiene Items
Ear plugs, sunscreen, reusable cotton wipes, tissue paper, hair brush, Natural Castille soap (for longer hikes), chapstick, toothbrush, biodegradable toothpaste
Brands we love include Dr Bronner’s for toothpaste and soap, Net Zero Company Reusable cotton pads soaked with Thayer’s Witch Hazel (alcohol-free)
Outdoor Apparel (womens)
When I first started out, a lot of my clothing originally was thrifted. You’d be amazed what you can find pre-loved, such as boots, thermal jackets, long sleeves, toques, and almost any camping gear. 95% of all my purchases were thrifted! I’ve been slowly adding to my collection of outdoor apparel over the years, and have discussed all of my favourite items below. It truly does make a difference finding items that you love, and worth the extra money for high-quality gear that will last you for years to come.
JACKETS
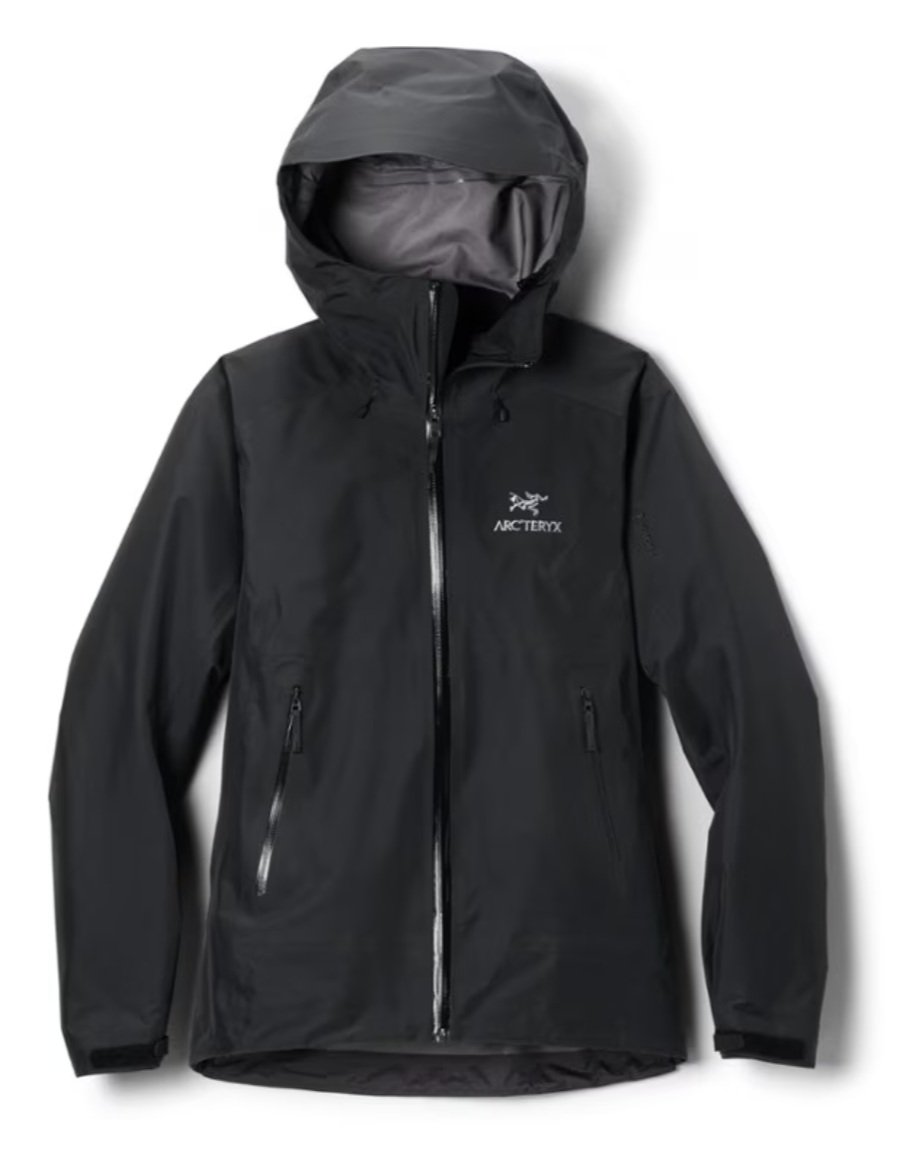
Down Jacket | I love my Arcteryx Cerium Down Jacket. This is a pricey item, but it’s one that will last for years and save you on those cooler days. Not to mention even in summer the mountains can get cold. I love Arcteryx gear because the quality is incredible, jackets are actually fitted rather than boxy, and they are easy to contact for repairs if you happen to damage your jacket.
Rain Jacket | The Beta Jacket is super light, fitted, packable and very waterproof. Another cheaper but great option is the LLBean Womens Cresta Stretch Rain Jacket. This one is a recent addition to my bag and I love it!

LAYERS
If there’s one thing I’ve learned over the years, it’s that proper layering is key to staying warm in the backcountry. Synthetic and wool materials are the best for moisture-wicking and retaining body heat. I strongly suggest staying away from cotton because it is heavy, absorbs a lot of moisture, and will take much longer to dry.
Mid-Layer/Fleece
My favourite cozy fleece for staying warm are the Kari Traa Rothe Midlayer, Marmot Polar Fleece, and the Patagonia Sweater


BASE LAYERS
Kari Traa and Icebreaker Merino base layers are what I’ve been using for several years. There are a few different levels of warmth depending on where you’re hiking, and how cold you get. I have both the 260 and 200 weight; the 260 is slightly heavier and warmer. I bring these on every backcountry trip, whether it is to hike or sleep in on cold nights.


I love having a light long sleeve for cooler days on the trail. Always go for synthetic or wool material to wick sweat and moisture from your body as you’re moving. I usually hike in a sports bra and comfortable t-shirt on warmer days.
BOTTOMS
I personally like hiking in leggings. A lot of hikers are against this because they don’t find them breathable, but I would much rather hike in leggings than anything else. I find looser pants chafe and can get in the way by snagging on branches + other things.
Leggings | I feel like leggings are all about personal preference! Glyder leggings are my favourite for cute colors and soft material! Other leggings I love are Vitae, LL Bean and Lululemon.
For multi-day hikes | and if rain is in the forecast, you should strongly consider having a pair of pants that are a waterproof shell. As long as they are light and waterproof, I don’t think there is a need to spend a lot of money on this item.
Sports Bra, Socks + Underwear | My favourite sports bras are from Glyder and they are pretty much the only ones I wear! For underwear, I go for anything comfortable (especially in the waist), stretchy, and not made of cotton. Merino Wool Socks are hands down the best for hiking because it’s a material that is breathable and helps regulate moisture. Cotton socks will most likely give you blisters due to moisture accumulation, especially on long hikes!
Gloves | I love the Icebreaker Merino Wool Gloves because they are very warm for how small and thin they are. I like having gloves that are thin enough to be able to do things like zipping up a jacket, taking a photo, and using the touch screen on a device.
Beanie/Toque | I’m a sucker for a big pom pom beanie! They should be made of wool or synthetic material, and stay away from cotton as it doesn’t trap heat as well. Haddock Headwear are my favourite regular beanies with such cute colors!
Gaiters/Micro Spikes | These are for snow and ice while on the trail, which is usually just in the winter or shoulder season. Do your research and check for trail conditions if you need to pack these items. I use the Kahtoola Micro spikes. Gaiters are for hiking in snow to prevent ice and water accumulation in the top of your boots. The Outdoor Research Gaiters are a good option to keep out snow and mud.

FOOTWEAR
Boots | My favorite boots are the Danner Mountain 600 and Wind River Thunder H83. These are both very comfortable for long or short treks and don’t have a break in time.
Sandals | I always bring a pair of sandals on an overnight hike because they are good for walking around camp to let your feet breathe after a long day, or if you get blisters. They are also easy to slip on and off when getting in and out of the tent rather than strapping up your boots each time. I love the support that Birkenstocks provide, however they are a bit heavier to carry than other options such as Tevas.
Down Booties | I bought my first pair last year and I’m obsessed. For anyone who gets cold feet like me, they are amazing to walk around camp at night, or for cozying up in the tent on cold nights. They aren’t a must, but they sure make my feet happy!
Personal Items and Resources
Hiking Poles | We recently bought a pair before our trip to the Yukon, and it was a game changer. Hiking Tombstone would have been way more difficult if it weren’t for these. They really saved our knees and supported us when hiking steep sections with loose rock. We use the Black Diamond Trekking Poles
Small Towel | When we know theres a lake or river that is swimmable, we always bring a small Towel incase we can cool off after a grueling hike!
Playing Cards | These are especially handy when in the backcountry for 4-5 days to pass the time on slow afternoons or evenings. It’s also a great way to meet other hikers!
Battery bank for charging devices | Great for longer hikes to charge a camera, cell phone, GPS or anything you need while you’re away. We use this one, but there are plenty out there to choose from.
Permits | Always check to see what kind of permits you need, and whether you need to check in at the visitor centre. Print out your permits and have them on hand to show the ranger.
Print out/Download Trail Map | We use Maps.me on every single hike. You pre-download an entire area and it shows you exactly where you are. Chances are, any trail you hike around the world will be shown on maps.me, and usually provides accurate elevation and distance. A topography map is a good backup incase your phone dies, or you lose the trail.
ID, a little bit of cash and credit card | You never know when you might stumble upon a lodge in the backcountry that serves beer! We are only half joking, as the lodge at Assiniboine is a little slice of paradise in the middle of nowhere, and the perfect stop for a cold one in the afternoon. ID is necessary for permits and identification if something happens to you (kinda grim but true), cash and credit are incase something happens to your vehicle (breakdown, flat tire, etc.).
Camera Attachment | This is one of the best items we have purchased to make backpacking easier with camera gear! It clips right on your backpack and allows you to safely carry your camera, while still being able to use it in seconds.
Camera Gear | We personally always bring a camera body, lenses, polarizers, lens cleaner, extra batteries and an extra memory card.
Finding Affordable Gear
For the last section of this post, we wanted to mention a few quick tips on how to find cheaper, high quality gear.
The end of each season is a great time to get gear. It’s usually when there are bigger sales to get rid of the previous years items.
If you can, always try to wait until something is on sale! There are always going to be sales, and they happen many times a year.
SteepandCheap has name-brand items that are up to 40-70% off
Check for the item you’re looking for on FB marketplace, Craigslist, and Poshmark; you definitely don’t need to buy everything brand new!


